
I’ve just finished another circle skirt made from an old duvet cover of mine. The duvet cover was not as old as the last one, but still had a copyright year of 1989 so it’s no spring chicken.
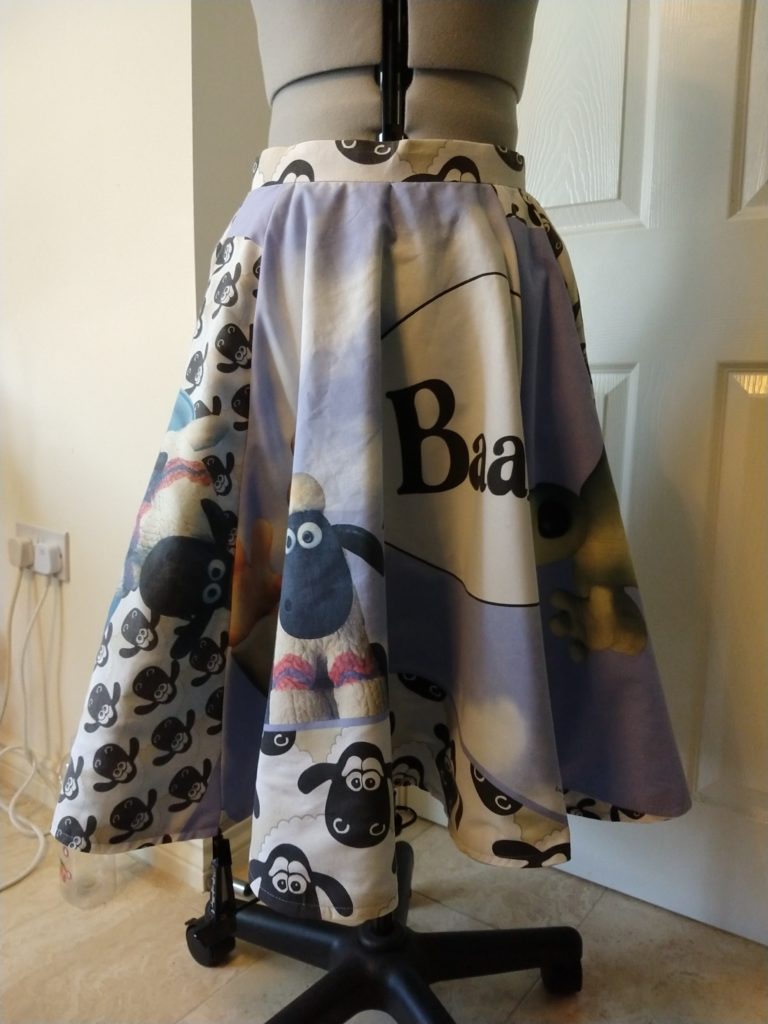
The Wallace & Gromit skirt from the front 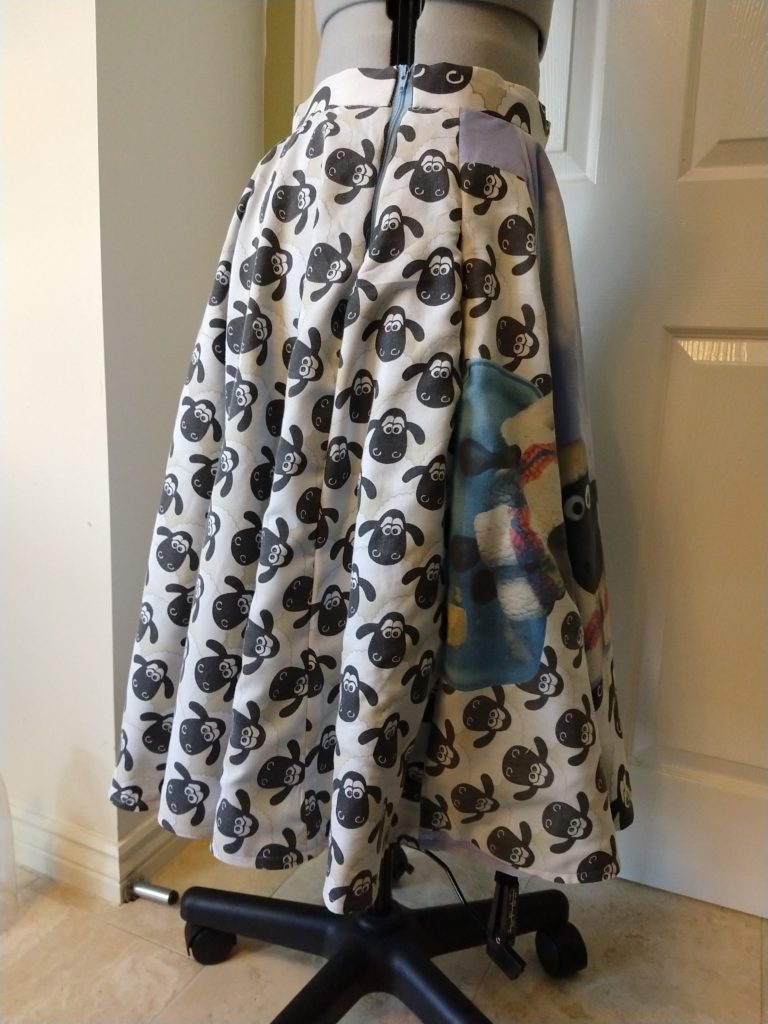
The Wallace & Gromit skirt from the right side 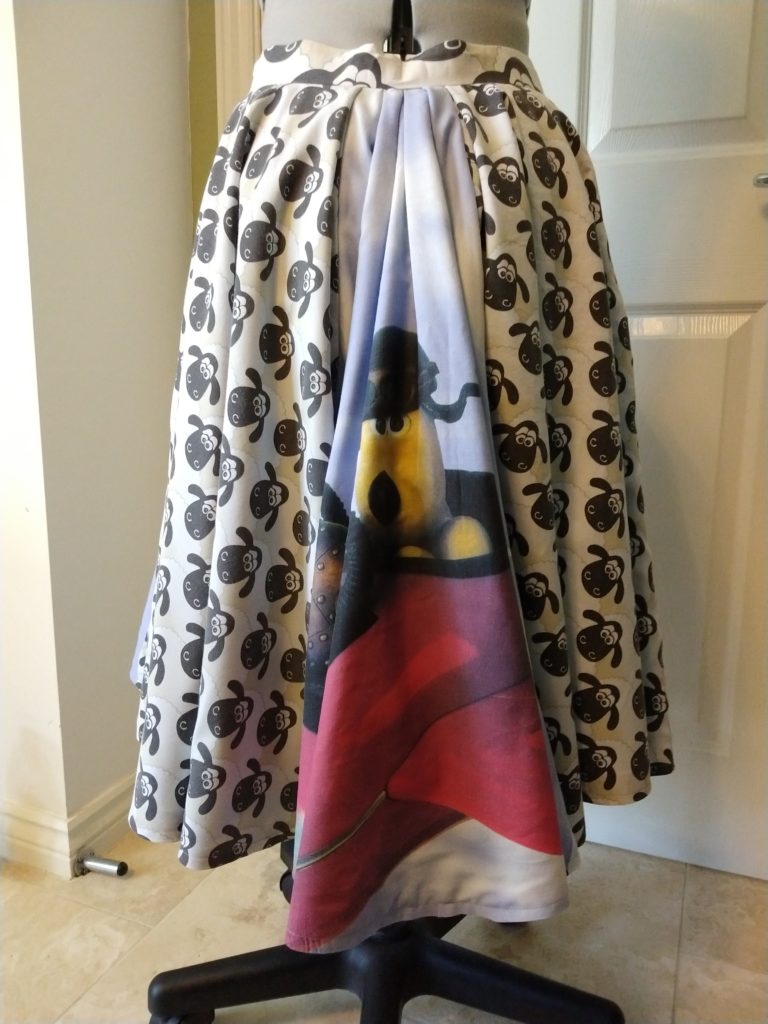
The Wallace & Gromit skirt from the back 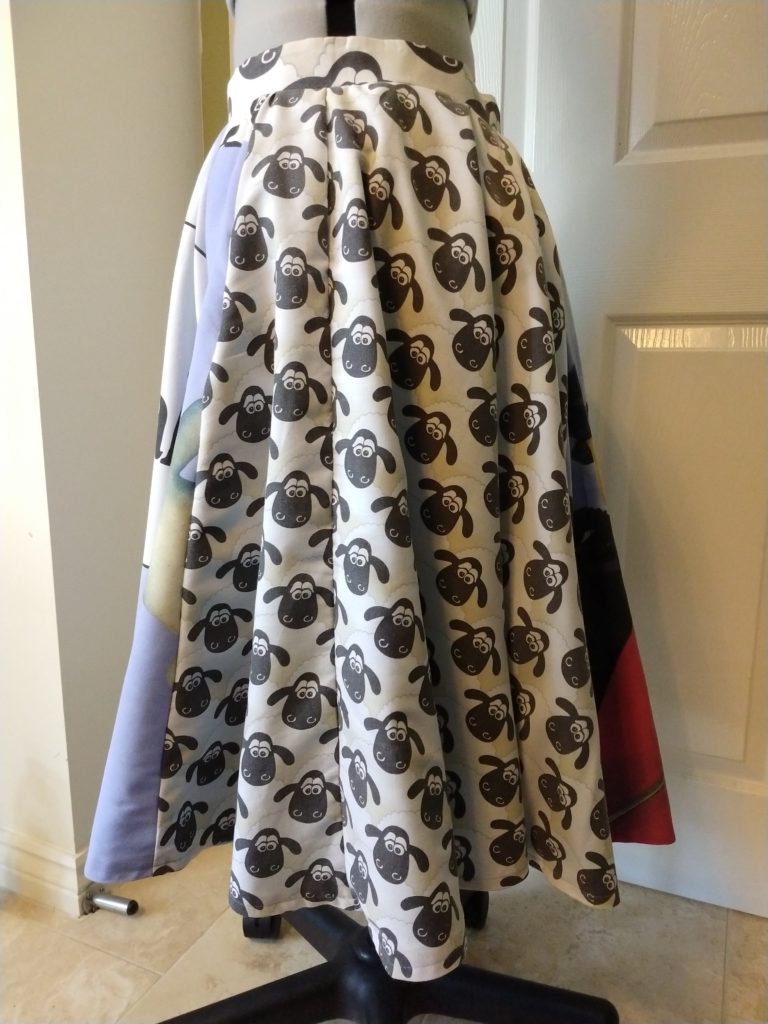
The Wallace & Gromit skirt from the left side 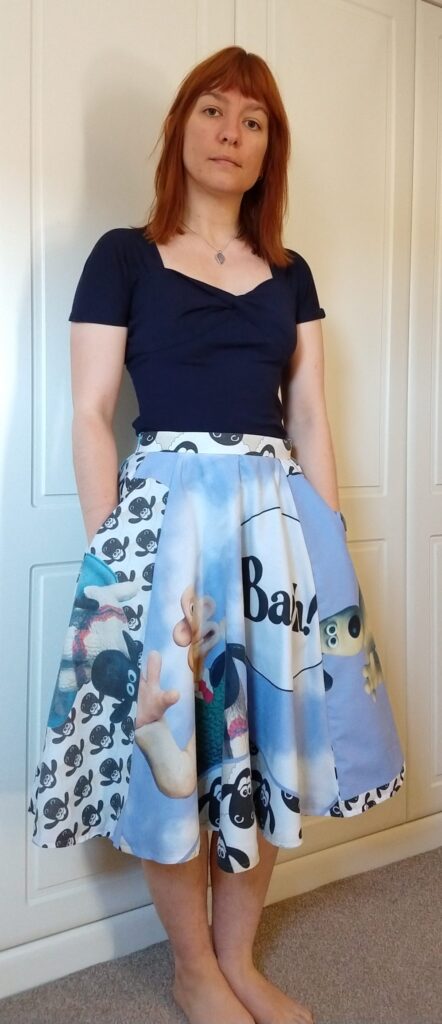
Michelle models the Wallace & Gromit skirt with hands in pockets
I used the same pattern from my previous skirt but had to do some tinkering to get enough material.
The previous duvet cover was made of a single piece of fabric with a repeating pattern throughout. This one was made of two pieces and the pattern was different on both sides. I should have taken photos of the original duvet cover so you can see what I’m wittering on about, but hopefully you’ll be able to match up my descriptions with the images above. Also, please ignore the fact I mixed up my left and right… I clearly wasn’t thinking straight that day.
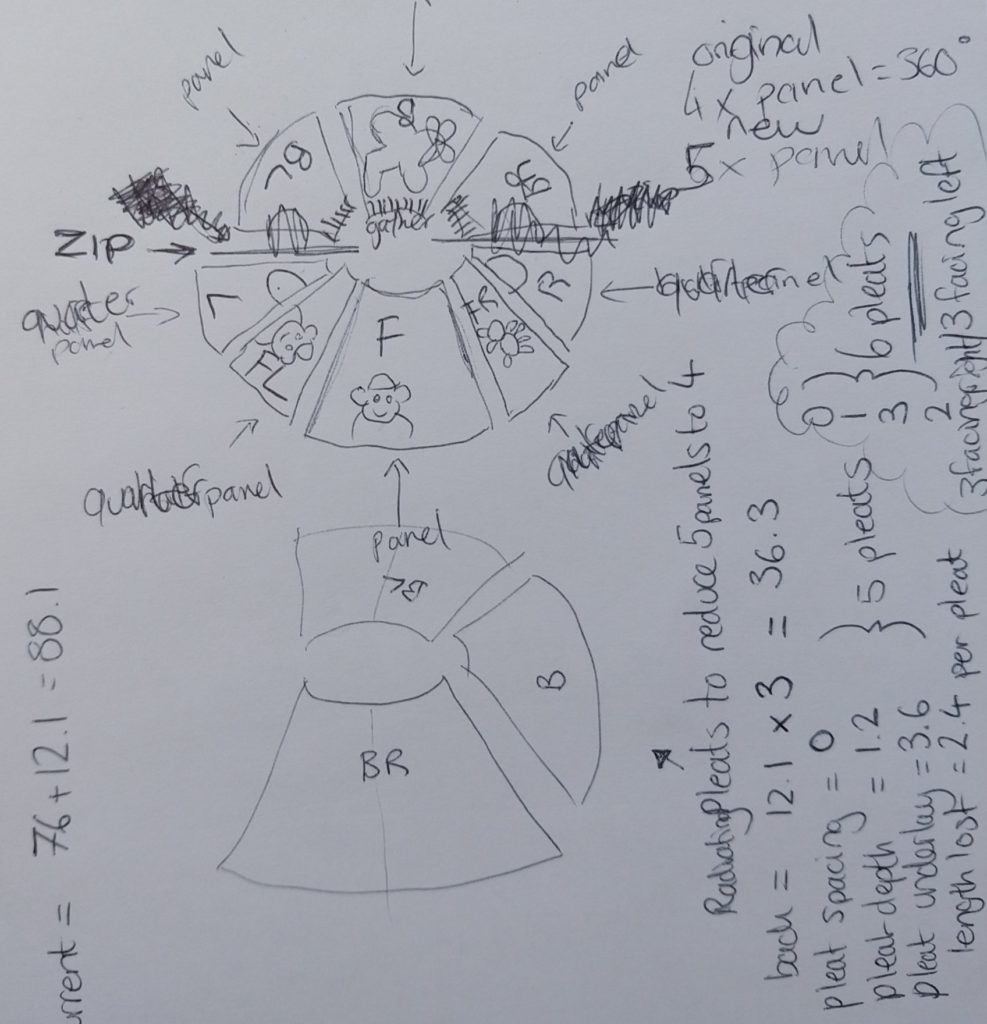
I got around this by making the skirt out of 4 panels and 4 quarter panels (my pattern folded in half – ignoring the seam allowance – and then half again, plus additional seam allowance for the other side). This way I could keep seams on the sides for the pockets I would add, and keep a separate seam to hold a zip. This did mean that I had more fabric that would need to be gathered down to fit the waist band, but I was happy with this compromise.
- Two panels from the front of the duvet cover
- Shaun and Wallace (F in the diagram)
- Gromit in a red airplane (B in the diagram)
- Two quarter panels from the pillow case
- Shaun (FL in the diagram)
- Gromit (FR in the diagram)
- Two panels from the back of the duvet cover (BL and BR in the diagram)
- Two quarter panels from the back of the duvet cover (L and R in the diagram)
A pocket would go along the seam between L and FL, and another would go along the seam of R and FR. The zip would go between the seams of L and BL.
I cut the same number of panels from a blue lining fabric. Learning from my previous project, I decided to treat the lining as a separate skirt, joining them at the waistband and hem only. This made the hemming process extremely long and frustrating, but it was worth it and did allow me to finish the raw edges around the pockets and the zip more easily and successfully.
To reduce width to bring the waist back down to my measurements (76cm) I pleated the back panel using knife pleats – three facing left and three facing right. They are 1cm wide, 3cm in total for the full width, taking out 12cm of width from the waistline – only a tiny bit less than I needed (12.1cm).
You can see my efforts to work out how much I needed to reduce the waist by and how wide the pleats should be in the calculations image above. Not entirely accurate but it worked out nicely.
Final Thoughts
Things to Improve
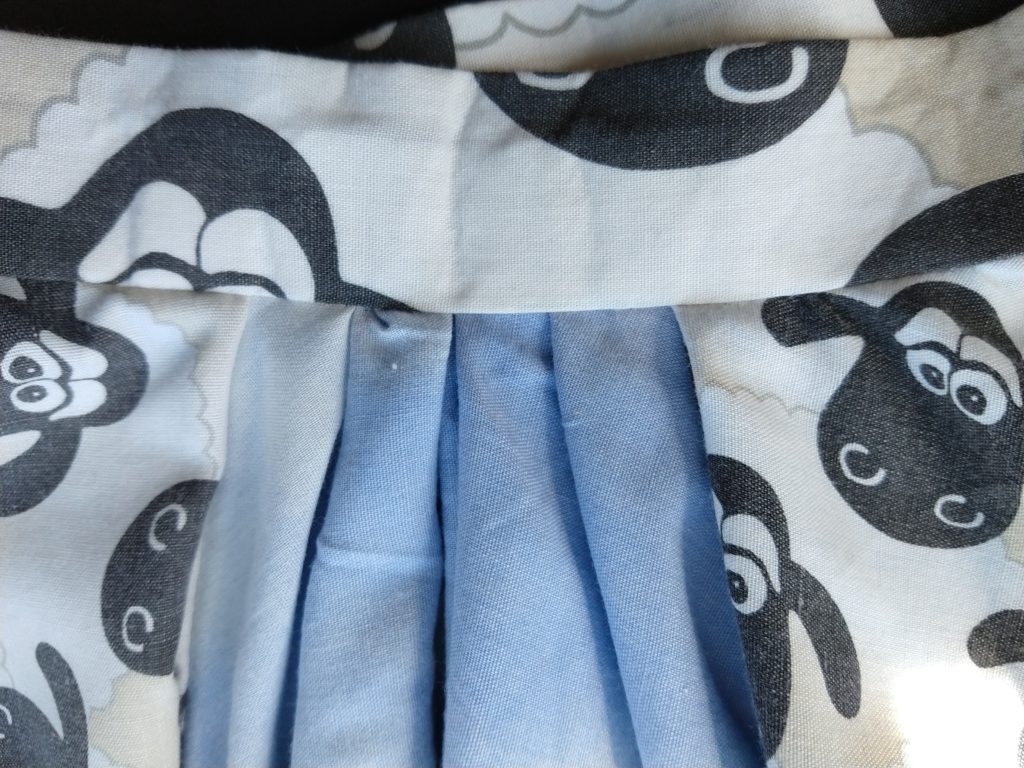
The pleats and waistband at the back of the Wallace & Gromit skirt 
The hem of the Wallace & Gromit skirt
The waistband is a little thin at the top and this shows the interfacing and makes it roll and bend. To fix this I need to use a lining as I did before to thicken the waistband and disguise the interfacing, and also to trim the raw edges that I hid inside the waistband so that the thickness is more even. I also think that it’s a little longer than my last waistband (possibly due to the fabric having stretched) so this skirt comes down a little lower on me, especially with the weight of the skirt.
The hem, though mostly nice, does occasionally show the lining fabric. It is decidedly difficult to match up two pieces of fabric with both a different thickness and stretch. I watched a video that mentioned a technique called flat lining so I might try that next time, though this does mean that my nicely finished pocket and zip edges would need to be done another way.
Things I Don’t Like
The lack of matching patterns is bugging me, but I think I can get over it because when I spin around while wearing the skirt it feels great and looks so beautiful!
The lining blue is the wrong tone but again, I can get over it – that’s just my inner perfectionist raising its voice.
Things I Like

The bound zip on the Wallace & Gromit skirt 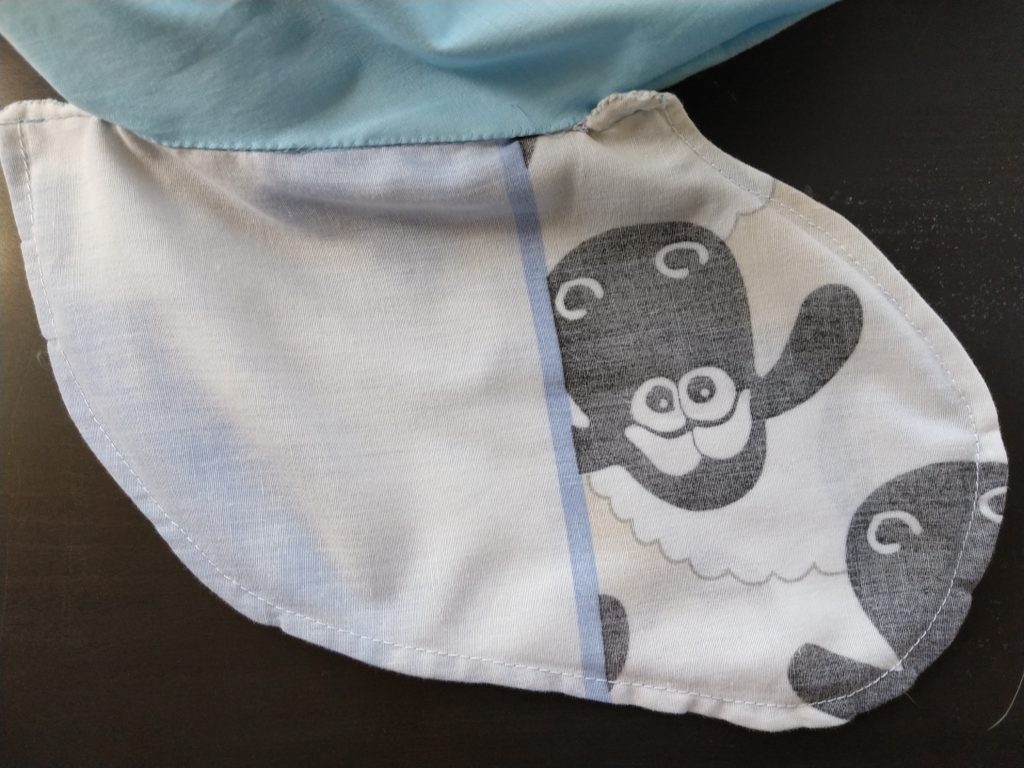
A French-seamed pocket on the Wallace & Gromit skirt
So many tidy edges! Look at them all, all neatly tucked away and whip-stitched down. Beautiful.
It’s a really soft skirt, and as already mentioned, it spins real nice!
Next Project
My next project will be a rectangle skirt.
I’ll be using some pig material that I bought ages ago but didn’t end up using.